This article will describe the process for downloading & installing the correct version of JDeveloper for development on your instance of E-Business Suite. It will discuss how to identify the correct version of JDeveloper to use and how to configure your OAF environment on your local machine.
Oracle JDeveloper (JDev) is the development tool we use to develop Oracle Applications Framework components, due to variations in the framework different versions of Oracle Applications require development to be performed on different versions of JDeveloper or at least the OAF flavour of JDeveloper. JDeveloper can be downloaded from metalink however prior to visiting meta link you will need to establish which version and patch set you are running as regards Oracle Apps.
To identify the correct version of Oracle Applications Framework we need to activate diagnostics. You can do this by ensuring the profile option “FND: Diagnostics” is set to “Yes”. Close your browser session and restart Oracle Applications, Log in and click the “About this Page” Link which can be found in the page footer.
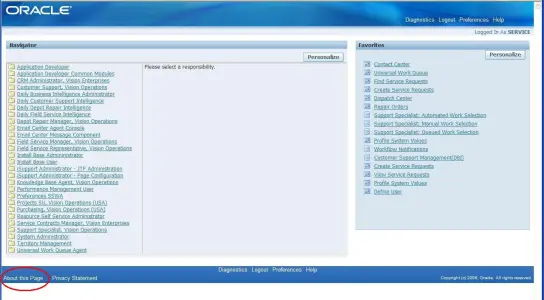
Fig 1
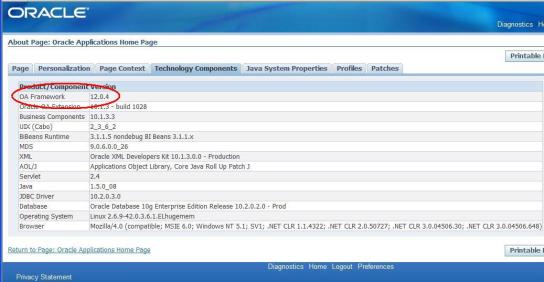
Fig 2
Now that we have identified the correct version of OAF we can visit metalink https://metalink.oracle.com note 416708.1 and download the corresponding version of JDeveloper. Download the file to a convenient directory on your machine, in this example we would download patch 6908968.
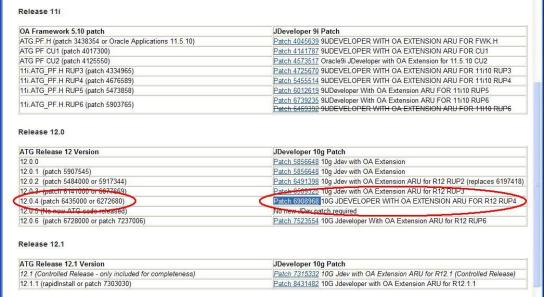
Fig 3
First unzip the JDeveloper zip file to a convenient directory. I recommend that you create a separate directory such as C:\JDeveloper\JDEV_R12_RUP4 . This will allow you to create further directories in the event that you download more versions and they will not conflict with each other. Once unzipped you will have three directories:
JDEVBIN: This is the JDeveloper software directory and contains the executables for the IDE.
JDEVDOC: This contains all help documentation including the OAF Developer Guide which will become invaluable to you as an OAF developer
JDEVHOME: This is where by default all of your project files and code will be created, sort of a my documents folder for JDeveloper.
Once installed we will need to create some shortcut links for your desktop so that you can launch JDeveloper and access the Developer Guide. Locate and create shortcuts for the following files for your desktop:
C:\yourInstallDirectory\jdevbin\jdev\bin\jdevW.exe for windows and jdev.exe for any other operating system.
C:\yourInstallDirectory\devdoc\index.htm
The jdevW.exe/jdev.exe links will launch JDeveloper and the index.htm will open the help documentation which contains a link to the OAF Dev Guide.
Before we launch JDeveloper we will complete one more configuration task and re-point the JDEVHOME directory to a central location i.e. My Documents or another partition where you keep all your files. This process is very helpful when it comes to running multiple versions of JDeveloper. Right Click on the “My Computer” icon and select the “Properties” option. Click the “Advanced” tab and then “Environment Variables”. Create a new user variable by clicking on the “New” button and enter JDEV_USER_HOME as the environment variable name and the path to your central directory as the value i.e. d:\my_files\jdev_home.
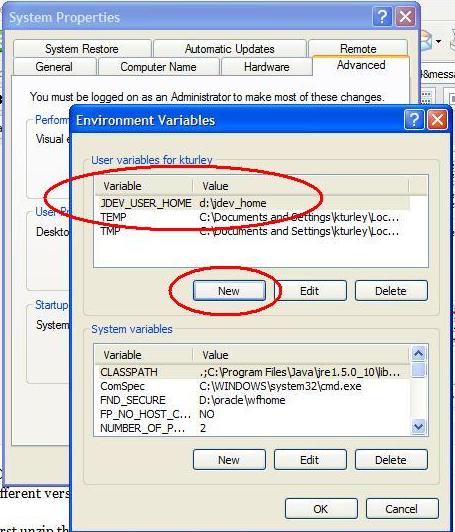
Fig 4
When JDeveloper is launched it will now automatically save your files and settings to the central user home rather than the default home in the installation directory. Always ensure that you back up your central user home to prevent the loss of critical project files.
Now we have our JDeveloper environment ready we need to get some environment specific setup completed so that you can interact with your E-Business Suite instance. In order to enable us access to apps we will need to obtain the DBC file and copy it to our local machine. The best way of doing this is to log into the application server using a tool like putty and obtain the file from $FND_SECURE by ftp using a tool like winscp, failing this you could obtain it from your DBA. Once you have your DBC file create a folder in your JDEVHOME directory called dbc_files\secure\ (Remember the JDEVHOME is the location that we assigned to the JDEV_USER_HOME environment variable in the previous steps) and copy the DBC file to it.
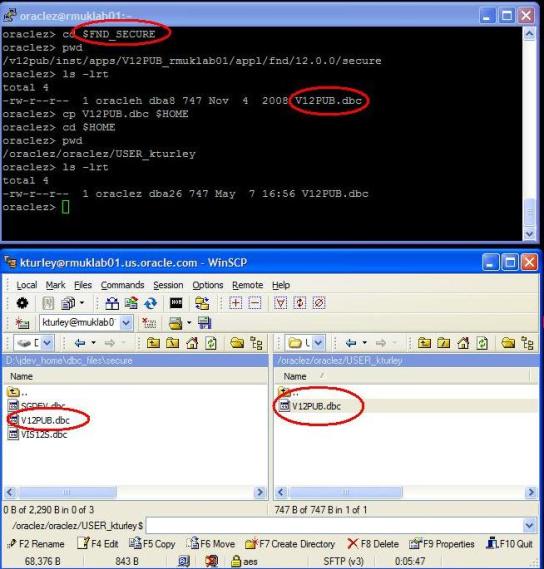
Fig 5
Now that we have our DBC file we can open JDeveloper and configure the database connection. Launch your JDeveloper download by clicking the jdevW.exe link that we created earlier.
If you are using JDeveloper 10g i.e. for an Oracle Applications Version of R12 then you will be prompted to see if you want to migrate from another version, select “No” for this example. You will also see a tip of the day, click the “Close” button.
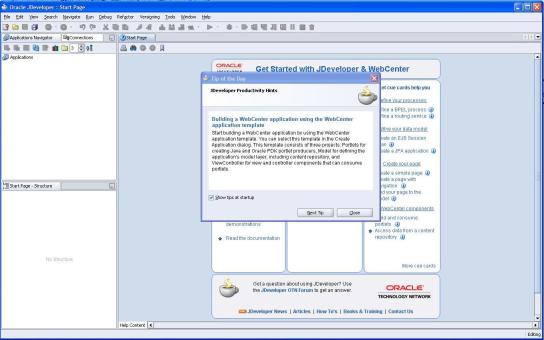
Fig 6
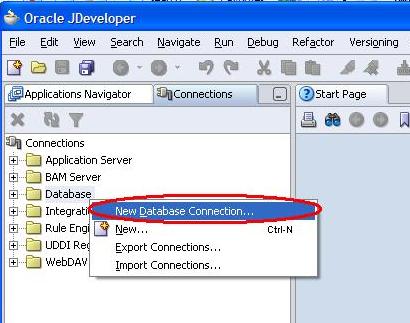
Fig 7
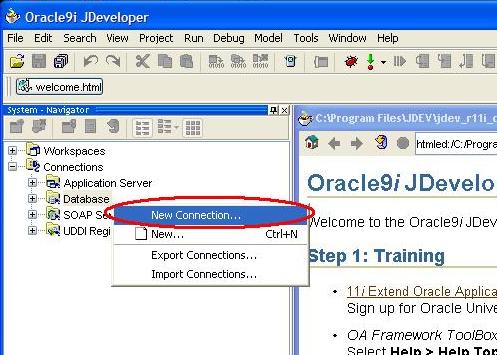
Fig 8
You will be presented with the Database Connection Wizard. Click “Next”
When prompted enter a name to represent your connection, this can be anything you like however I have just used the database SID for simplicity
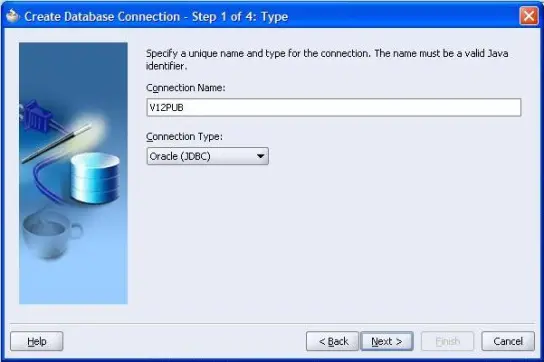
Fig 9
Click “Next” and enter the database username and password, this will need to be the apps account and password, leave the role field blank.
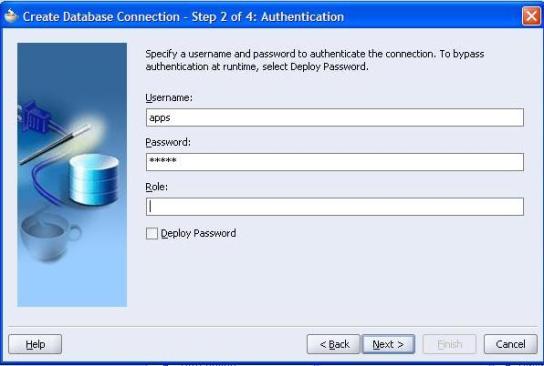
Fig 10
Click “Next” and enter the database hostname, port and SID
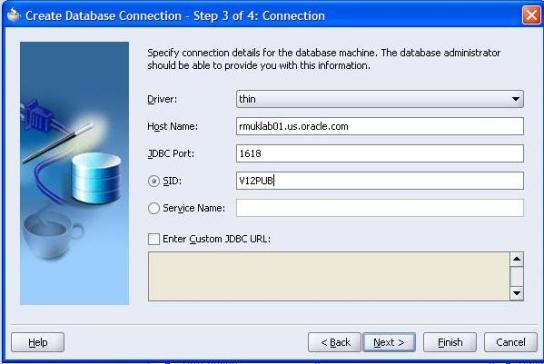
Fig 11
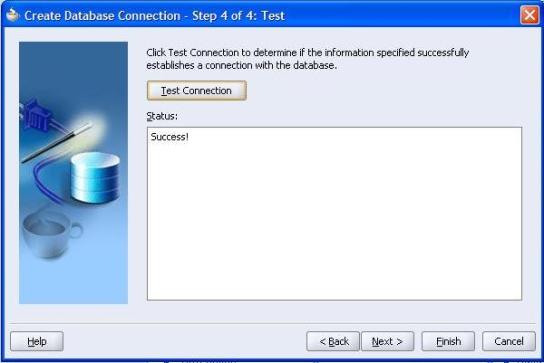
Fig 12
Click File > Open and navigate to JDEV_USER_HOME/myprojects and select the file toolbox.jws If you are running JDeveloper 10g you will automatically be in your JDev User Home with 9i you may have to navigate there manually due to a bug in the IDE.
If you are running JDeveloper 9i select the “Show Categories” icon, this will help us identify the test jsp page to run later.
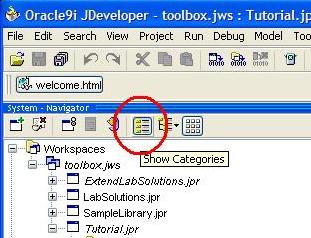
Fig 13
Now that we have the toolbox workspace open we need to modify the project settings in Tutorial.jpr, navigate to the project node under the toolbox node and right click on the “Tutorial” node and select “Project Properties” in 10g and “Project Settings” in 9i.
You will be presented with a properties screen with several options in the left hand pane, expand the “Oracle Applications” node and select the “Run Time” sub menu item. Your screen will look similar to this.
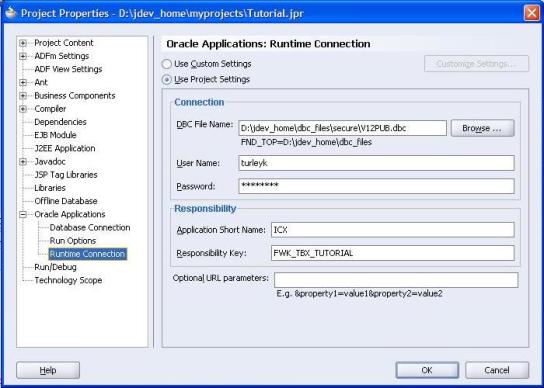
Fig 14
select fnd_web_sec.validate_login('','') from dual; This should return ‘Y’ as the result indicating that your account is setup correctly.
Repeat the above test for the Guest account specified in your DBC file (Usually GUEST/ORACLE).
Enter ICX as the application short name and FWK_TBX_TUTORIAL as the responsibility, these parameters define which responsibility we will be running the project under.
Select OK when you have finished.
We are now ready to run the test project:
In JDeveloper 9i navigate to the file test_fwktutorial under Workspaces > toolbox.jws > Tutorial.jpr > HTML Sources > test_fwktutorial.jsp
In JDeveloper 10g navigate to the file test_fwktutorial under Applications > toolbox > tutorial > Web Content > test_fwktutorial.jsp
Right click the test_fwktutorial.jsp node and select “Run” in 10g and “Run test_fwktutorial.jsp” in 9i
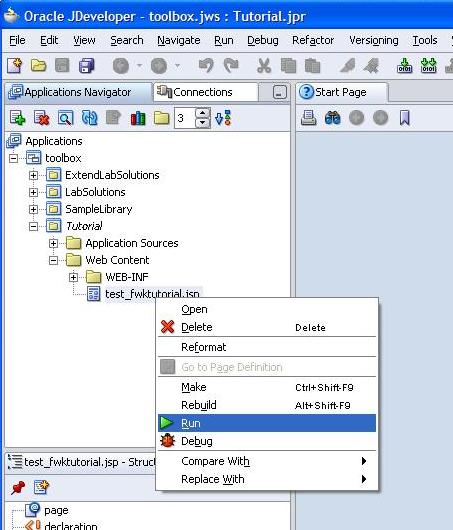
Fig 15
If you are running on a remotely hosted environment prepare for this process to be slow (anywhere from 2 – 10 minutes dependant on your network) you are now effectively running an embedded server from your local machine and a lot of information will be pinging to and from your machine and the application server on the environment, normally these two components would be hosted on the same server and thus the performance will be seriously degraded.
Once complete you should see the below screen.
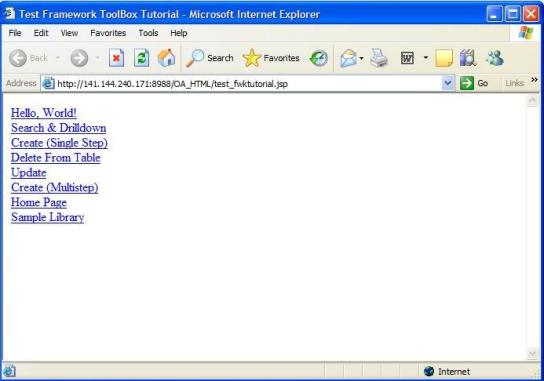
Fig 16
Congratulations! You have successfully configured JDeveloper.
If you experience problems configuring your JDeveloper version then refer to meta link note 330236.1 for guidelines on raising a service request.
This post is very informative for everybody. I would like to appreciate your work for good accuracy and got informative knowledge from here. Nice effort, very informative, this will help me to complete my task. Thanks for share it keep it up
ReplyDeleteOracle Fusion HCM Training